
Can I cover a dog’s wound myself? Yes, you can often cover a minor dog wound yourself after proper cleaning, but always contact your vet first for serious injuries. When a dog gets hurt, knowing how to safely cover the wound is key to quick healing. This guide gives you simple steps. We will show you the right way to manage the injury. Good canine wound care starts with stopping the blood flow.
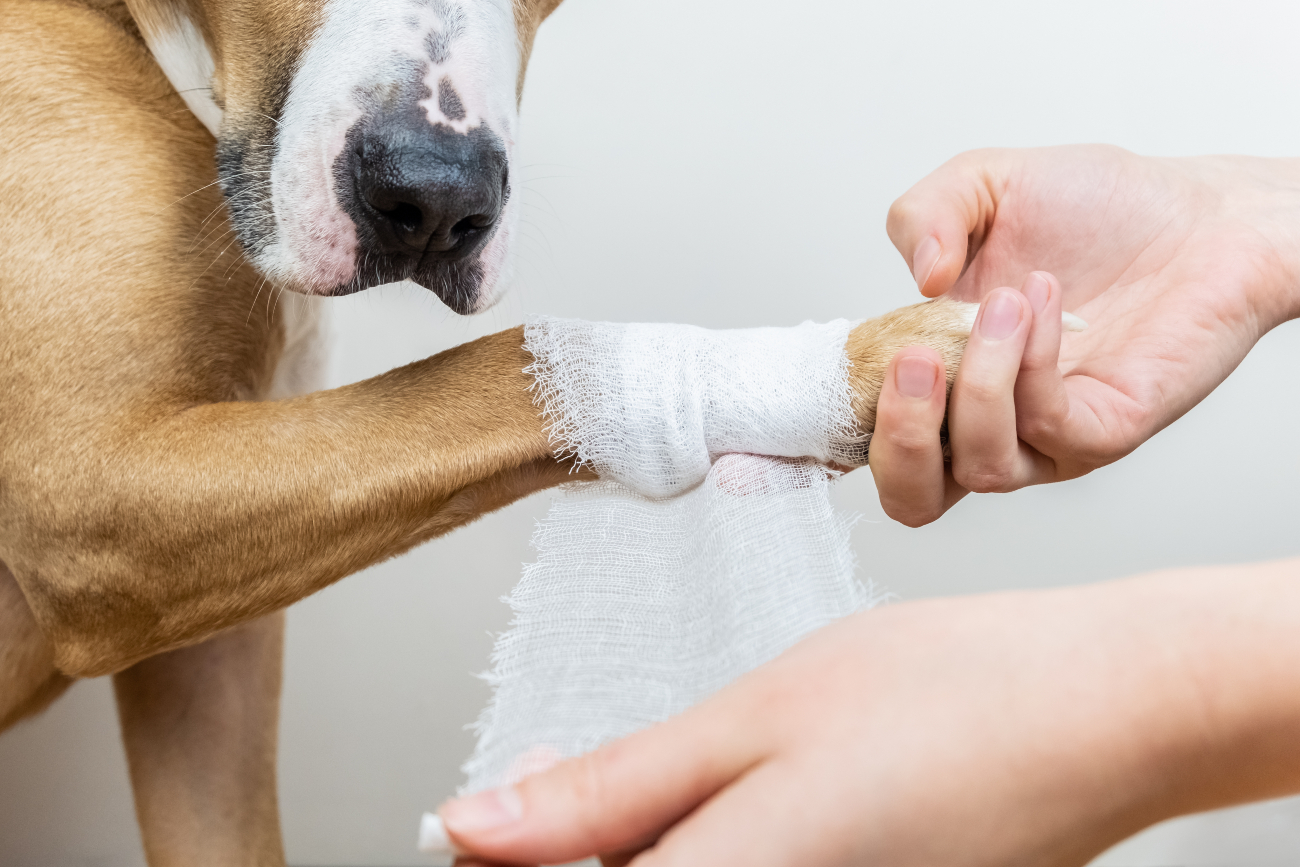
Image Source: www.purelypetsinsurance.co.uk
First Steps: Dealing with Bleeding and Assessment
When your dog has a cut, your first job is to stay calm. Your dog feeds off your energy. If you panic, your dog will get more scared.
Stopping a Dog’s Bleeding
If the wound is actively bleeding, your immediate goal is stopping a dog’s bleeding. This is step one before you clean or cover anything.
- Apply Gentle Pressure: Use a clean cloth, sterile gauze, or even a clean towel. Press firmly but gently right on the wound.
- Hold Steady: Keep the pressure on for five to ten minutes without peeking. Lifting the cloth too soon breaks the forming clot.
- Check for Success: If the blood soaks through the cloth, place another layer on top. Do not remove the first cloth. Keep applying pressure.
- Seek Vet Help If Bleeding Continues: If the bleeding does not stop after ten minutes of direct pressure, this is an emergency. You need to get to the vet right away. Deep cuts or artery damage require professional help fast.
Checking the Severity of the Cut
Once the bleeding slows or stops, look closely at the injury. This helps you decide the next steps for treating dog lacerations.
- Minor Scrapes: These are shallow surface injuries. They might just need a good clean and a simple cover.
- Deep Cuts or Gaping Wounds: If you can see fat, muscle, or bone, or if the edges of the skin pull apart, do not try to treat this fully at home. These need stitches and professional care.
- Embedded Objects: If glass, splinters, or debris are stuck deep in the wound, leave them alone. Pulling them out can cause more bleeding or damage. Cover the area around the object and go to the vet.
Preparing the Area: Cleaning a Dog’s Cut
Proper cleaning is vital. It washes away dirt and germs that cause infection. This is a major part of good canine wound care.
Gathering Your Supplies
Before you start, have everything ready. You do not want to leave your dog unattended while hunting for supplies. Think about what you will need for a proper dog wound dressing.
| Supply Item | Purpose | Notes |
|---|---|---|
| Clean Towels/Gauze | Pressure and cleaning | Use sterile gauze if possible. |
| Saline Solution or Warm Water | Flushing the wound | Saline is best; sterile is ideal. |
| Antiseptic Solution | Gentle cleaning | Povidone-iodine (diluted) or Chlorhexidine. |
| Scissors/Clippers | Trimming fur | Only if you can do so safely. |
| Protective Gloves | Safety for you | Prevents transfer of germs. |
| Bandaging Materials | Covering the wound | Non-stick pads, rolled gauze, cohesive wrap. |
Step-by-Step Cleaning Process
Follow these steps carefully when cleaning a dog’s cut:
- Muzzle Your Dog (If Necessary): Even the sweetest dog may bite when in pain. Use a soft muzzle or ask a helper to gently restrain the dog.
- Trim the Hair: Use blunt-tipped scissors or electric clippers to carefully cut the hair away from the edges of the wound. Hair traps bacteria. Trim back at least one inch around the entire injury. Be very careful not to nick the skin.
- Flush the Wound: This is the most important step. Use lukewarm sterile saline solution or clean, running water from a tap. Flush the wound vigorously for several minutes. This physically washes out debris. Think of it like rinsing a dirty dish.
- Apply Antiseptic (Gently): If the wound is clean after flushing, you can use a diluted antiseptic. Mix povidone-iodine (it should look like weak tea) or use a veterinarian-approved chlorhexidine solution. Dab this around the wound edges. Avoid pouring strong chemicals directly into deep tissues.
- Rinse Again: A final, light rinse with saline or water removes any soap or antiseptic residue.
Choosing the Right Materials for Covering the Wound
What you use to cover the injury matters a lot. You need materials that keep the wound moist but allow air circulation, preventing infection while protecting dog stitches if they are already placed.
Non-Stick Contact Layer
The first layer touching the wound must not stick to the healing tissue. This is crucial for pain-free bandage changes.
- Sterile Non-Adherent Pads: These are the gold standard. They keep the wound bed moist, which speeds healing, and do not tear off scabs when removed.
- Petroleum Jelly Gauze: Some vets recommend this as a cheap alternative. It keeps the wound surface slick.
Absorption Layer
This layer sits over the contact layer. Its job is to soak up any fluid or drainage (discharge) from the wound.
- Rolled Gauze or Cotton Padding: This material provides cushioning and absorbs fluid. Do not wrap it too tightly, as this can cut off circulation. This is where many owners go wrong when trying a DIY dog wound cover.
Outer Protective Layer (The Wrap)
This layer holds everything else in place and keeps dirt out. This is the actual bandage. When wrapping a dog’s leg wound, this layer is essential for support.
- Cohesive or Self-Adherent Wrap: This is the best bandage for dogs for home use. It sticks to itself but not to the fur. Common brands are Vetrap or similar products. They offer good support and are easy to apply.
- Medical Tape: Used sparingly, usually to secure the ends of the cohesive wrap.
Important Note on Materials: Avoid using human materials like elastic bandages (ACE wraps) directly on the skin, as they can cause swelling. Never use materials that stick directly to the fur, like duct tape or adhesive bandages, unless specifically instructed by a vet. Many high-quality veterinary wound supplies for dogs are available online or at your clinic.
Applying the Dog Wound Dressing: Step-by-Step Guide
The method changes slightly depending on where the wound is. Wrapping a dog’s leg wound requires special attention to circulation.
General Wound Covering Procedure (Torso or Side)
For wounds on the body, the goal is to secure the dressing so the dog cannot easily chew or lick it off.
- Apply Contact Layer: Place the non-stick pad directly over the cleaned wound. Ensure it fully covers the injured area.
- Apply Absorption Layer: Wrap the rolled gauze or cotton padding loosely over the contact layer. Start wrapping a few inches below the wound and move a few inches above it. The wrap should be snug enough to stay put but loose enough that you can slip a finger underneath it easily.
- Apply Outer Protective Layer: Use the cohesive wrap over the gauze layer. Overlap the wrap by about half its width each time you circle around. This keeps the layers tight but still flexible.
- Secure the Edges: Use a small piece of medical tape to secure the end of the cohesive wrap, usually high up on the dog’s body where it won’t rub.
Technique for Wrapping a Dog’s Leg Wound
Leg bandages need to be precise. Improper wrapping can cause serious swelling or even tissue death if too tight.
- Protect Toes (If Applicable): If covering the paw or lower leg, spread a thin layer of petroleum jelly or wrap the exposed toes with a piece of gauze. This helps monitor for swelling (toes should stay pink and warm).
- Start Below the Wound: Begin wrapping the leg gauze about two inches below the wound. Wrap in an upward spiral motion.
- Cover with Contact and Absorbent Layers: Place the non-stick pad over the cut. Then, wrap the absorbent gauze firmly (but not tightly) over the pad.
- Use Overlapping Turns: When applying the final cohesive layer, use a technique called “walking the bandage.” Start low, move up the leg, then overlap back down toward the start, like you are weaving. This helps distribute pressure evenly.
- Check Circulation: Once done, check the toes or the area furthest from the wrap. They should be warm to the touch. If the toes swell up, look blue/cold, or the dog seems overly agitated, the wrap is too tight. Cut it off immediately and re-wrap it more loosely.
Caring for the Bandage and Monitoring Healing
A dog wound dressing is not a one-time fix. Daily monitoring is necessary for safe healing.
When to Change the Dressing
How often you change the bandage depends on the wound drainage.
- Very Wet/Draining: Change the entire bandage every 12 to 24 hours.
- Slightly Moist: Change every 1 to 2 days.
- Dry and Holding Together: Check daily, but you might be able to wait 3 days.
When changing the dressing, always be prepared to clean the wound again, just as you did initially. This process is essential for good canine wound care.
Recognizing Infection and Problems
Watch carefully for any signs that the wound or the bandage is causing trouble.
- Foul Odor: A bad smell coming from under the wrap is a sign of serious infection.
- Excessive Swelling: If the area around the bandage swells significantly (especially the limb extremities), the bandage is too tight.
- Discharge Color: While some yellowish fluid (serum) is normal, thick green or dark brown discharge indicates bacteria.
- Dog Chewing/Licking: If your dog is frantic to get at the area, the bandage might be uncomfortable, or the underlying injury might be hurting more. You may need an E-collar (cone).
Alternatives for Minor Injuries: When You Don’t Need a Full Bandage
For very minor scrapes that have stopped bleeding and look clean, a full bandage might trap moisture and slow healing. This is where a DIY dog wound cover can sometimes be used minimally.
Using Topical Treatments Only
If the cut is very superficial—a scrape or abrasion—you might skip the bulky wrap after cleaning.
- Apply Antibiotic Ointment: Use a triple antibiotic ointment approved for dogs (check with your vet first to ensure it doesn’t contain ingredients harmful if licked).
- Use a Protective Barrier: A light barrier like a thin layer of non-stick dressing or simply letting it air dry (if the dog cannot reach it) might be best. Air drying is effective for small, clean wounds.
The Importance of Confinement
No matter how well you apply the dog wound dressing, if the dog runs, jumps, or plays rough, the bandage will fail, or the wound will reopen. Rest is non-negotiable. Keep your dog quiet and confined to a crate or small room until your vet says they can resume activity. This is vital for protecting dog stitches or healing tissue.
Professional Veterinary Supplies vs. Home Care
While this guide helps you manage the initial situation, knowing when to use professional-grade veterinary wound supplies for dogs is important.
When to Definitely Call the Vet
A professional should handle these situations:
- Deep Punctures: Any bite wounds or puncture wounds that go deep. These almost always need flushing and antibiotics because they trap bacteria deep inside.
- Large Lacerations: Cuts longer than half an inch or that won’t stay closed without pulling.
- Foreign Objects: If you cannot easily rinse out debris.
- Wounds on Joints or Sensitive Areas: Wounds over elbows, knees, or on the face often need more careful closure to function correctly later.
Advantages of Professional Bandaging
Vets have specific tools and knowledge that improve outcomes:
- Cast Padding: They use specialized, thick padding that manages severe swelling better than simple rolled gauze.
- Knowledge of Tension: They know exactly how much tension to apply, especially critical when wrapping a dog’s leg wound to avoid pressure sores.
- Medicated Dressings: They can incorporate topical medications directly into the dressing layers that are safer or more effective than over-the-counter creams.
Summary of Best Practices for Dog Wound Cover
To make this process easy to remember, focus on these core principles:
- Safety First: Muzzle if needed. Stay calm.
- Clean Aggressively: Flush, flush, flush! Use clean water or saline.
- Dress Lightly: Do not wrap too tightly. Check toes or extremities often.
- Prevent Licking: Use an E-collar (cone) until the wound is fully healed or the dressing is removed by a vet.
By following these careful steps for cleaning a dog’s cut and applying a sterile dog wound dressing, you give your pet the best chance for a speedy recovery while treating dog lacerations safely at home until professional care can be sought if needed.
Frequently Asked Questions (FAQ)
Q: How long can I leave a bandage on my dog?
A: For minor wounds with little drainage, you might leave a simple dressing on for up to three days. However, for draining or infected wounds, you must change the dressing daily. Always follow your veterinarian’s specific advice, as they might require changes sooner or later based on the specific wound type.
Q: Can I use Neosporin on my dog’s wound before wrapping it?
A: You can use triple antibiotic ointment if your vet approves it first. Some ointments contain ingredients that can irritate dog skin or may be harmful if the dog licks a large amount. If you use ointment, use a very thin layer, and then cover it with a non-stick pad before padding and wrapping.
Q: My dog keeps chewing the bandage off. What should I do?
A: This is very common. The absolute best solution is an Elizabethan collar (the “cone of shame”). If the cone is truly impossible, try covering the bandage with a snug, well-fitting t-shirt or a specialized recovery suit. Ensure the suit doesn’t rub against the wound edges or the bandage itself.
Q: What should I use instead of gauze if I don’t have any?
A: For the absorption layer, you need something soft and absorbent. A clean, thick cotton cloth or a clean, freshly laundered flannel material can act as a temporary substitute for rolled gauze. Always ensure any cloth used is clean and lint-free if possible. Remember, this is only for temporary, emergency cover until proper veterinary wound supplies for dogs can be obtained.