
A properly fitting dog cone should allow your dog to eat, drink, and rest comfortably without being able to reach the injured or healing area.
The recovery period after surgery or injury is tough for dogs. They often need a barrier, commonly known as an Elizabethan collar (E-collar) or “the cone of shame,” to stop them from licking or chewing wounds, stitches, or hot spots. Getting the right fit is vital. A bad fit causes stress, can prevent healing, or even lead to new injuries. This guide will help you master the fitting process. We will look at dog cone sizing, proper adjustment, and how to make the experience easier for your pet.
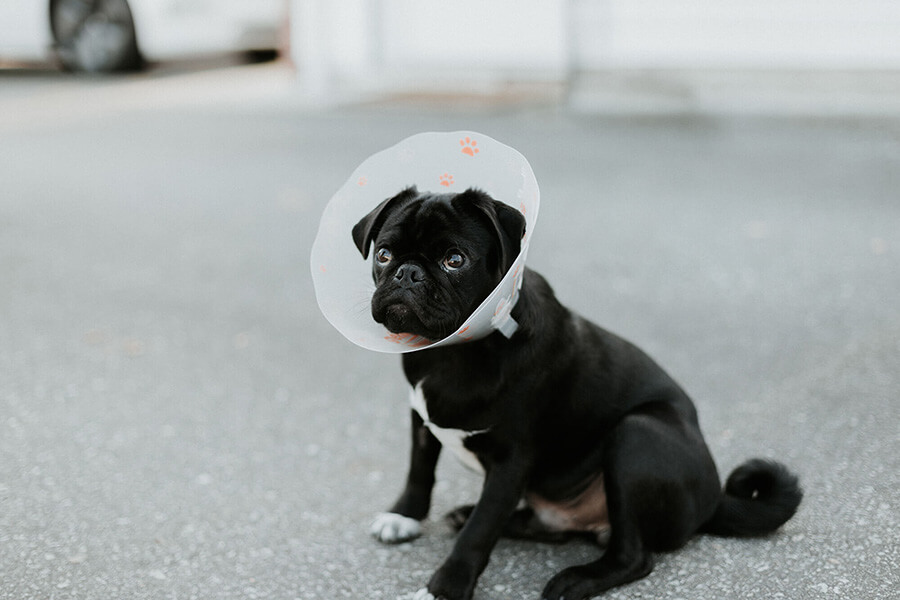
Image Source: petsinstitches.com
Measuring for a Dog Cone: Getting Started Right
The first step to success is accurate measuring. Guessing sizes rarely works for pet gear, especially medical devices. You need two key measurements to start: the neck size and the length required.
Determining Dog Cone Neck Circumference
The collar must fit snugly around the neck but not tightly. Too loose, and the dog can easily slip out. Too tight, and it restricts breathing or circulation, causing real harm.
To find the right dog cone neck circumference, follow these simple steps:
- Use a soft fabric tape measure.
- Wrap it gently around the dog’s neck where a normal collar sits. This is usually where the neck meets the shoulders.
- Note the measurement in inches or centimeters.
- Crucially, add two fingers’ width (about one to two inches) to this number. This buffer space ensures comfort and prevents choking. This final number helps you choose the correct cone size based on the manufacturer’s specifications.
Calculating Dog Cone Length for Licking Protection
The cone must extend past your dog’s nose when their head is fully extended. This prevents them from bending their neck to reach a specific body part.
To measure the necessary length:
- Have your dog stand up straight.
- Measure from the base of their neck (where the collar sits) straight out to the tip of their nose.
- This distance is the minimum required length for the cone.
A cone that is too short means the dog can still lick the target area. A cone that is too long can be clumsy, causing the dog to bump into furniture or struggle to eat.
Selecting the Best Dog Cone Types
Not all cones are created equal. The Elizabethan collar fit changes significantly based on the cone’s design. Traditional plastic cones are rigid, while newer designs offer more comfort.
| Cone Type | Pros | Cons | Best For |
|---|---|---|---|
| Traditional Plastic (A-Frame) | Excellent barrier protection, easy to clean. | Can be loud, restricts peripheral vision, can be heavy. | Maximum protection against reaching specific spots. |
| Inflatable/Soft Collars | More comfortable, less impact on vision and hearing. | Easier for determined dogs to bypass, less sturdy. | Minor irritations, short-term use, dogs sensitive to hard plastic. |
| Fabric/Padded Collars | Lightweight, softer edges, often reversible. | Can absorb moisture/dirt, might not cover all body areas. | General post-op protection, sleeping comfort. |
| Clear Plastic Cones | Better peripheral vision than opaque cones. | Still rigid, can cause similar rubbing issues. | Dogs needing sight to navigate easily. |
Choosing the best dog cone types often means balancing protection with your dog’s quality of life during recovery. For most post-surgical needs, a cone that matches the length measurement precisely is the safest bet.
Achieving the Elizabethan Collar Fit: Step-by-Step Guide
Once you have the measurements and a cone in hand, the goal is ensuring proper dog cone fit. This process involves securing the cone around the neck and then checking for safety and function.
Securing the Cone Around the Neck
Most cones use one of two main methods for attachment: an adjustable strap system or a simple loop that fits over an existing collar.
Adjustable Strap Method
This method offers the most control over tightness.
- Loosen the Straps: Open all fastening straps fully before attempting to place the cone on your dog.
- Placement: Gently slide the cone over the dog’s head. The wide end should sit flush against the neck area.
- Initial Tightening: Start adjusting a dog’s recovery cone by pulling the straps until the wide base rests comfortably against the neck.
- The Two-Finger Rule: Slide two fingers between the cone base and your dog’s neck. You should feel the base but not feel pressure. If you cannot fit two fingers, it is too tight. If there is a large gap, it is too loose.
- Securing Fasteners: Close the Velcro, clips, or snaps securely.
Using an Existing Collar (If Applicable)
Many high-quality cones have loops sewn onto the neck ring. These loops are designed to slide your dog’s regular, well-fitting collar through them.
- Why use the loops? This is key to preventing dog cone slippage. When the dog’s collar is threaded through the loops, the cone is anchored to the dog’s body, making it much harder to shake off.
Checking for Functional Fit (Comfort and Mobility)
A perfect physical fit on the neck doesn’t mean the cone is functional. You must test how it affects your dog’s daily activities. This is essential for E-collar comfort for dogs.
Eating and Drinking
This is often the biggest challenge with cones.
- Test 1: Food Bowl Access: Place the food bowl down. Does the cone hit the floor before the dog can reach the food? If the cone is too long, the dog may struggle or refuse to eat. You may need to temporarily raise the food and water bowls on a sturdy step or crate platform.
- Test 2: Water Access: The cone rim should not dip into the water bowl, which can make it soggy or prevent access. If using an inflatable collar, this is less of an issue. For hard cones, ensure there is clearance.
Vision and Movement
Dogs rely heavily on sight and spatial awareness. A restrictive cone impairs both.
- Peripheral Vision Check: Can the dog see where they are going? A cone that is too wide or too close to the eyes can cause panic or bumping.
- Navigation Test: Walk your dog around a familiar room. Watch for excessive bumping into walls, door frames, or furniture legs. While some bumping is inevitable, constant hard impacts suggest the cone is too wide for your home environment.
Licking Access Test
This is the ultimate confirmation that the cone is working.
- Ask your dog to sit or lie down.
- Have a helper gently try to distract them (a favorite toy or treat held just out of reach).
- Observe their neck angle. If they can turn their head and reach their flank, incision site, or paw with their teeth, the cone is too short or has slipped out of place. Immediately re-measure the length requirement.
Maintaining the Fit During Recovery
The fit of the cone is not a one-time adjustment. It needs regular monitoring throughout the recovery period.
Dealing with Swelling and Weight Changes
If your dog is on anti-inflammatories or fluids, their neck size might fluctuate slightly.
- If the swelling goes down (common after the first few days post-op), the cone might become looser. Check the two-finger rule daily.
- If your dog is very stressed and loses weight rapidly, the cone might also become looser.
Always check the fastenings, especially if you notice the cone spinning freely around the neck—this means it is slipping, and you risk the dog getting access to the wound.
Softening the Edges for E-Collar Comfort for Dogs
Rigid plastic cones can chafe the skin, especially under the chin or around the ears, leading to secondary skin irritation.
- Padding: Use soft, rolled-up washcloths or foam padding (often sold specifically for this purpose) placed gently between the plastic rim and the dog’s neck or chest. Secure the padding gently with medical tape or vet wrap, ensuring it does not restrict breathing or slide into the throat area.
- Checking Skin Integrity: Every time you check the fit, look at the skin underneath the cone rim. Redness, hair loss, or raw spots mean you need to add padding or re-evaluate the cone size or type.
Advanced Considerations for Difficult Cases
Some dogs, particularly those with long necks, unusual body shapes, or high levels of anxiety, present unique fitting challenges.
Correct Sizing for Long-Necked Breeds (e.g., Greyhounds, Collies)
For breeds where the neck is significantly longer than the body depth, a standard-sized cone might be long enough but too narrow at the base, or too wide at the tip.
- The Length Priority: Always prioritize the length measurement. It is safer for the dog to have a slightly wider cone that is the correct length than a perfectly sized neck base with a cone that is too short.
- Securing Stability: Use multiple attachment points. If the cone has four loops, use all four to anchor it to the existing collar. This stabilization prevents the cone from swinging wide and becoming a lever the dog can use to reach around.
Managing Cone Anxiety
If the dog refuses to move, eat, or drink, the cone is causing too much distress. While a cone is necessary, you must improve its fit or transition the type.
- Gradual Introduction: If possible, introduce the cone while the dog is calm, offering high-value treats only when the cone is near or on them.
- Vision Improvement: Switching to a clear plastic or a donut-style inflatable collar can drastically improve anxiety related to restricted vision.
FAQ: Common Questions About Dog Cone Fit
Can I cut the plastic cone myself?
Yes, but you must be extremely careful. If the cone is too long, you can cut the pointed tip off to improve mobility. Never cut the wide neck opening, as this weakens the structure and ruins the primary neck fit. When cutting, sand or file the edges smooth immediately to prevent sharp points that could scratch your dog or others.
What if my dog keeps pulling the cone off over their head?
This usually means the dog cone neck circumference measurement was too loose, or the cone is not properly anchored.
- Re-measure the neck and ensure you allow for only two fingers of space.
- Confirm that the dog’s regular collar is securely threaded through all available loops on the cone base. The collar acts as a physical stop against the dog pulling the cone over its ears.
How long must the cone stay on?
This is determined by your veterinarian. Typically, cones stay on until all external sutures are removed (usually 10 to 14 days) and the incision site is fully closed and dry, without any scabs that could be pulled off. Never remove the cone early, even if the area looks better. Licking can introduce bacteria and tear open healing tissues instantly.
Does the cone need to be removed for short periods?
Generally, no. If the cone is fitted correctly—allowing drinking and eating—it should remain on 24/7. Removing it only creates a small window of opportunity for the dog to damage the wound while you are distracted. Supervision is crucial if you must temporarily remove it for short grooming or specialized feeding.
What if my dog can still reach their back or tail area?
If the incision is on the hindquarters, you may need a specific “bariatric” or extra-long cone, or you may need to combine the cone with protective recovery clothing (like a surgical suit or onesie). The cone must always be longer than the furthest reachable point on the body. This often requires the cone length measurement to be significantly longer than just the nose tip distance.
Final Thoughts on E-Collar Success
Achieving the perfect Elizabethan collar fit requires patience and attention to detail. By focusing on accurate measuring for a dog cone—both neck size and required length—and utilizing all available securing features, you maximize your dog’s safety and comfort. A well-fitted cone is a temporary tool that ensures a faster, complication-free recovery. Regularly check for chafing, ensure food and water access, and praise your dog often to make this necessary device less stressful.